MHz UTC ITU Program + Location Details Remarks km
87.70 1421 D MDR Kultur, Chemnitz/Geyer (sac) Aircraft scatter Logged with Highpoint’s Aircraft Scatter plugin 574km
88.40 1430 D Bayern 2, Pfaffenberg (bay) 341km
World of DX-ing
MHz UTC ITU Program + Location Details Remarks km
87.70 1421 D MDR Kultur, Chemnitz/Geyer (sac) Aircraft scatter Logged with Highpoint’s Aircraft Scatter plugin 574km
88.40 1430 D Bayern 2, Pfaffenberg (bay) 341km

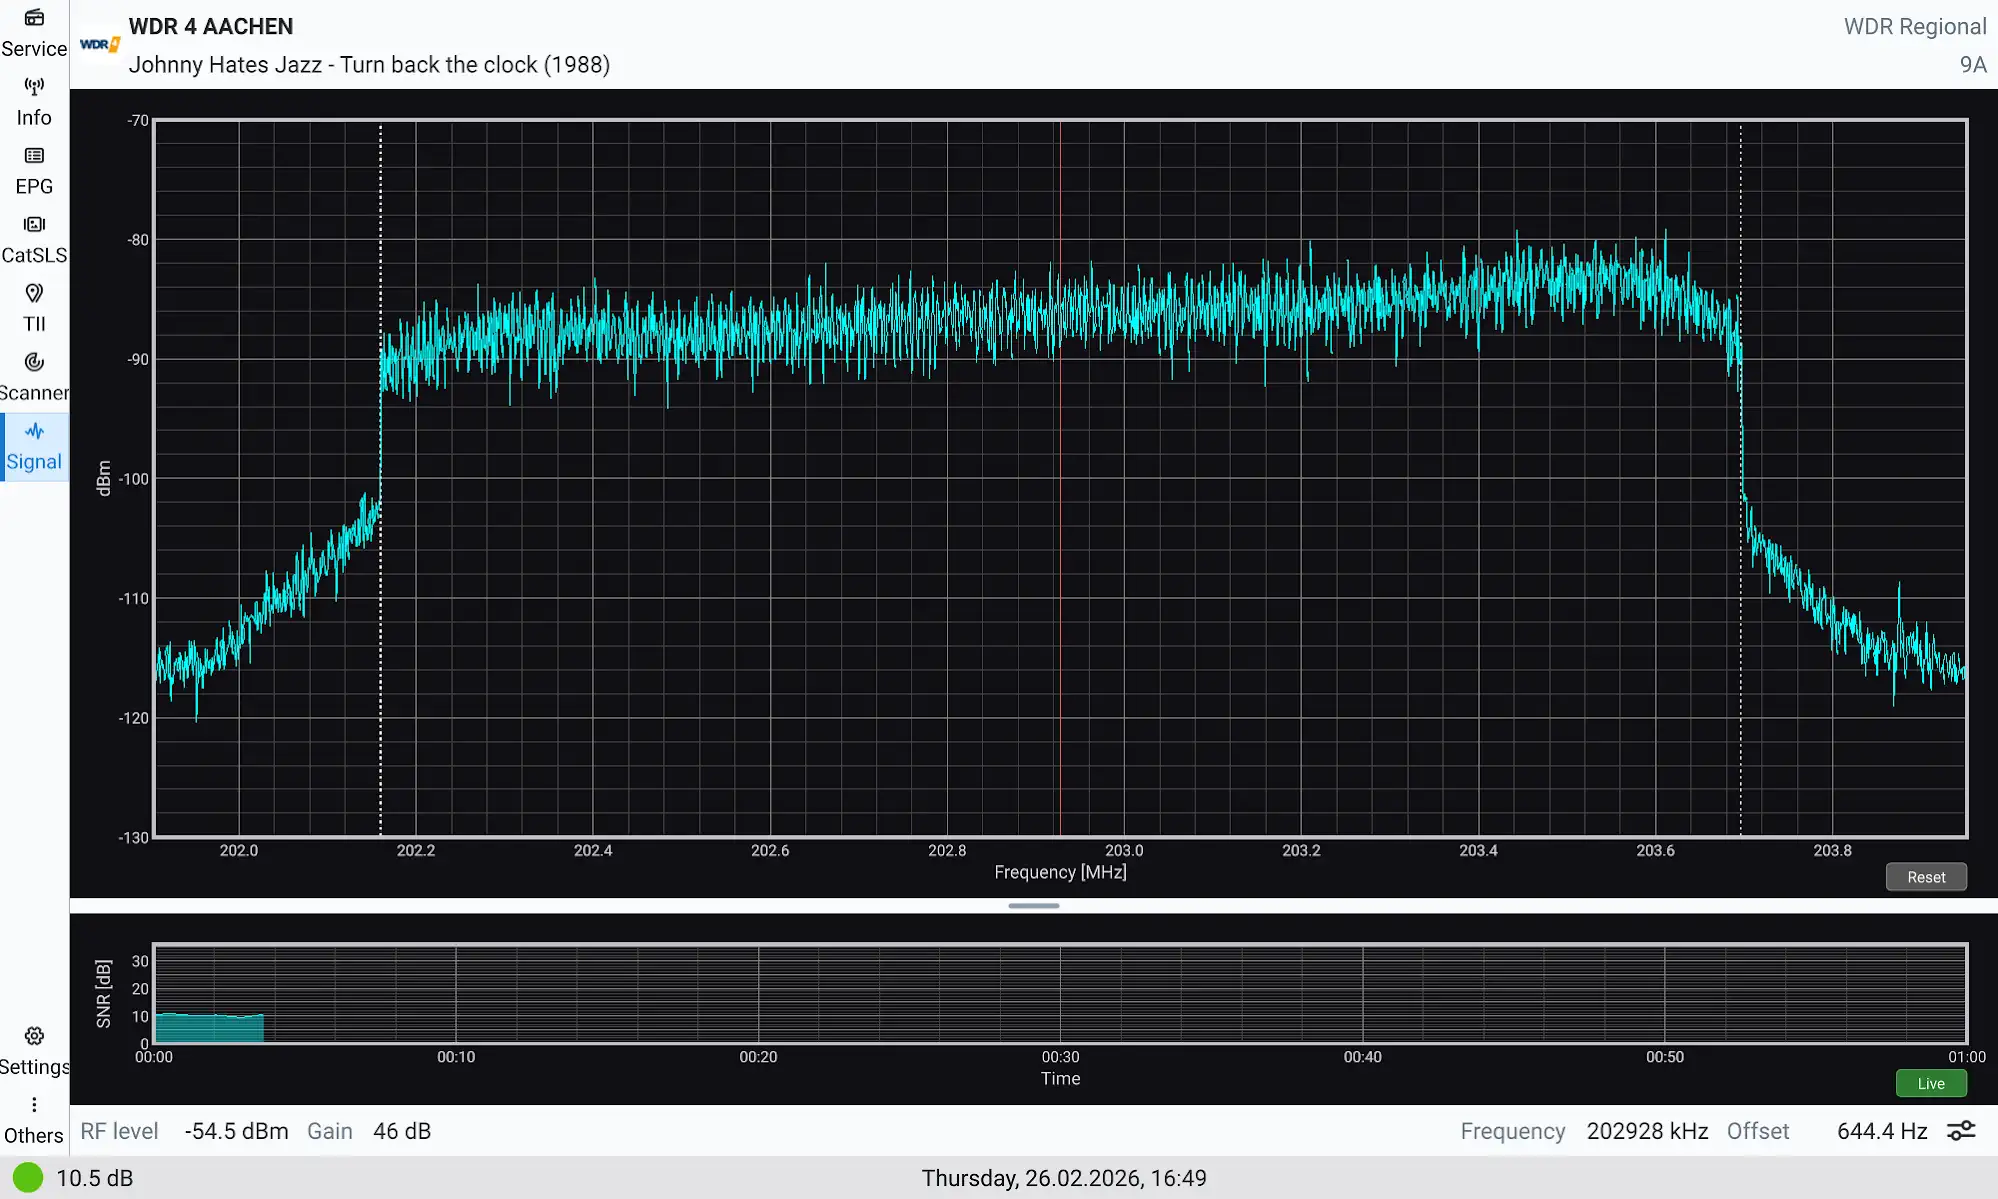
Yesterday Brabant Wallon 1 came on air on MUX 8B. Three locals are included: Passion FM, Up Radio and Vitamine. ERP 1 kW. Location: Jodoigne, Château des Cailloux. No TII set yet.

Petr Kopecký recently released AbracaDABra v3.99.1 (4.0.0 beta 2) on his releases Github page.
The update includes several improvements, with a focus on the new APK:
AbracaDABra-v3.99.1-arm64-v8a.apk.
This version facilitates DAB DX operations and TII code verification on the move, making portable testing more practical.
Rather than relying on a laptop, which can be cumbersome, I prefer using a tablet—specifically, my Lenovo Tab Plus 11.5″ with 8 GB RAM and 128 GB storage—paired with the TEF Logger App for FM scans.
I installed the APK on my tablet, Pixel 7A smartphone, and an older Nokia 8.1 smartphone, whose smaller screens (6.1″ and 6.18″) present some navigation challenges within the app.
Nonetheless, this setup proves efficient for field DAB operations.
First thing to do if you don’t have an OTG cable at hand: run a *.uff or *.raw generated by the desktop AbracaDABra. The file initially did not execute due to an unexpected issue: when transferred to a tablet or phone, the operating system automatically changed the extension to .uff.xml or .raw.xml.
Recognising this, simply correcting the file extension restored functionality, allowing the files to run smoothly without issues.
Connecting the RTLSDR to a tablet or phone.
Once the RTLSDR is recognised, setup and operation are identical to configuring AbracaDABra on Windows or Linux systems.
Properly set up with a good OTG connection the AbracaDABra ran smoothly on the three devices mentioned above.
This is an excellent tool developed by Petr Kopecký.